


Mopeka Pro Check Universal Bluetooth Tank Level Sensor (Victron Compatible)


You may also need:


Mopeka Pro Check Universal Tank Level Sensor
Introducing the Mopeka Pro Check Universal Sensor, the evolution of our renowned Pro Check Technology, offering enhanced usability and connectivity along with groundbreaking new features:
Improved Accuracy – Building upon the Pro Check's 99% accuracy, the Pro Check Universal achieves an impressive 99.5% accuracy level.
Expanded Compatibility – The Tank Check App accompanying the Pro Check Universal now supports additional commodities, including Diesel, Oil, Water, Propane, Butane, Anhydrous, and other liquid commodities. 63% Increase in Battery Life – Enjoy a substantial increase in battery life compared to the original Pro Check.
Secure Mounting Collar – Ensures safe and secure attachment to your non-magnetized surface, coupled with dielectric grease for added protection. Elevate your outdoor cooking and propane-powered experiences with confidence using our advanced digital propane tank gauge. The Pro Check Universal is essential for outdoor enthusiasts, offering real-time updates on your propane level via a seamless mobile app connection. Additionally, the sensor can measure other liquid commodities such as Oil, Diesel, and Water.
Effortless Installation – Bid farewell to complex setups. Our tank sensor easily attaches to the underside of your tank using powerful magnets or mounting collars, securing within seconds. Designed to fit tank sizes up to 250 gallons, our sturdy magnets and mounting collars ensure the sensor remains firmly in place on your RV's propane tanks, providing peace of mind during your travels.
Extended Battery Life – Our tank sensor boasts a significantly longer-lasting battery, ensuring prolonged operation without replacement. When needed, the battery is replaceable.
Cutting-Edge Technology – The Pro Check Universal features integrated temperature sensing, a tank "bubble level" indicator, configurable sample timing, firmware updates, and customizable alarms/alerts, all enhancing reading quality and precision. It seamlessly works with both vertical and horizontal cylinders, offering versatility and reliability for tank monitoring.
Free Mobile App – Download our user-friendly "Tank Check" app for free on Apple and Google Play stores. With unlimited tank and sensor support, the app allows customizable alarms to suit your preferences.
Upgrade to the Mopeka Pro Check Universal sensor for unparalleled convenience, accuracy, and precision in monitoring all your tank levels.
*For Aluminum LP Gas Cylinders, please also purchase the Mopeka Pro Check Universal Collar Set (LPG Cylinders) for the most secure fit to the base of your Aluminum LP Gas cylinder.
Communication (How to Read Level)
Free Mopeka Check Bluetooth APP on your smartphone or tablet; Or Mopeka Check LED Display.
![]()
.png)
Power
CR2032 Battery
Installing the Mopeka Pro Check Universal
1. Go to your app store. Search for Mopeka Tank Check app and install.
2. Launch the app. When it starts it will automatically start a search for Mopeka sensors.
3. Press and hold SYNC button until sensor appears on app. (up to 10 seconds)

4. The sensor will then appear on your app as a new device.
5. Sensor is now Sync’d. You may now proceed to installing the sensor on the tank.
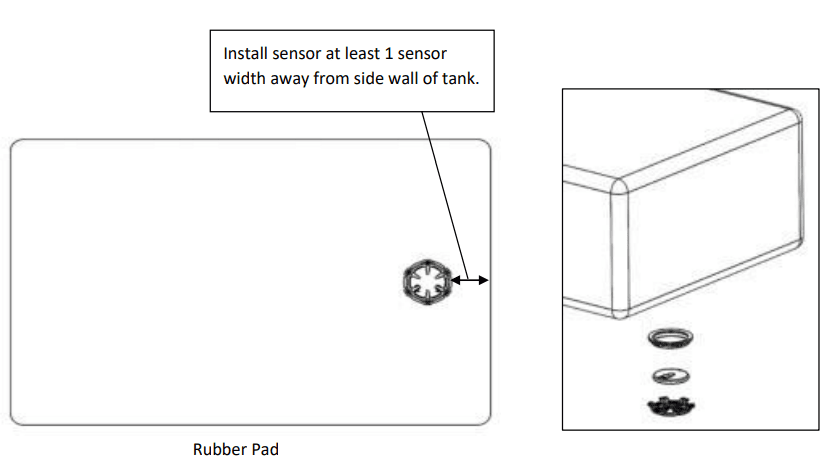
6. Clean the bottom of the tank of any debris
7. See graphic below for recommended installation location on bottom of water tank.
8. Now apply provided primer to the area of the tank that will be contacted by the adhesive on the collar. Squeeze the primer tube as shown on primer, to release flow of primer.
9. Peel paper from adhesive on the collar and press the collar firmly on the tank. Press firmly on every collar flange to ensure adhesive makes good contact and is properly activated.
10. Apply a generous amount of the supplied dielectric grease directly to the sensor pad before attaching sensor to the tank.
11. Install sensor into collar with Sync button facing away from tank. Black rubber contact pad should make contact with tank bottom.
12. Install snap ring over the sensor and collar to retain sensor.
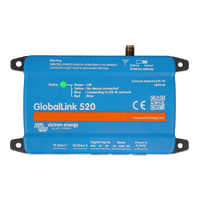
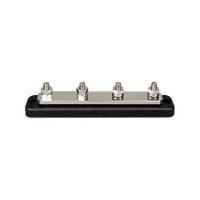
14. Victron Energy Mopeka Pro Sensor Support Cerbo GX Integration - Cerbo GX Manual Link
14.1. Introduction
Mopeka Pro Check-Water and Pro Check-Sensor LPG support has been added to Venus OS. These ultrasonic sensors use BLE (Bluetooth Low Energy), a wireless technology that allows devices to be networked within a range of about 10 meters, while consuming significantly less power compared to ordinary Bluetooth technology.
The Mopeka Pro sensors feature ultrasonic sensing for water and LPG tanks in horizontal or vertical cylinders and mount to the bottom of those tanks by magnets. The liquid level, temperature and sensor battery voltage is streamed wirelessly to the GX device.
Note that the Cerbo GX & Cerbo-S GX built-in Bluetooth connection is disabled when the internal CPU temperature exceeds 53 degrees C (influenced by load and/or ambient temperature). For reliable operation it is necessary to use a USB Bluetooth adapter.
USB Bluetooth adapters that have been tested and known to work:
-
Insignia (NS-PCY5BMA2)
-
Logilink BT0037
-
TP-Link UB400(UN)
-
Ewent EW1085R4
-
Laird BT820
-
Laird BT851
-
Kinivo BTD-400
-
Ideapro USB bluetooth adapter 4.0
A list of additional adapters that are also being tested, as well as adapters that have been tested and are known not to work, is available here: https://community.victronenergy.com/questions/112834/connect-ruuvi-to-ccgx.html
14.2. Installation
The installation of the Mopeka Pro sensor is very simple. First, however, the sensor must be installed according to Mopeka's installation instructions and configured via the Mopeka Tank app (available in Google Play and Apple App Store). Then the installation and configuration is done in the GX device as described below.
-
Make sure that Bluetooth is enabled in the Bluetooth sensors menu (enabled by default).
-
Go to Settings → I/O → Bluetooth sensors menu.
-
Move the Enable slider to the right to enable Bluetooth sensors.
-
To find your Mopeka Pro sensor, scroll down until you see them.
-
To activate the sensor, move the slider to the right. It should now appear on the Device List.
-
Repeat steps 1..5 for more than one sensor.
14.3. Configuration
-
Go to the Device List menu.
-
Scroll up or down and select the appropriate sensor.
-
Press the right arrow key or space bar on that sensor to open up the sensor Setup menu.
-
Scroll down to Setup and right arrow key or space bar again to open up the sensors Setup menu.
-
In the Setup menu you can change the tank capacity, select the liquid type and volume unit, set up calibration values for empty and full tank levels and read the actual sensor value.
-
After setup, go back to the Sensor overview menu.
-
Scroll down, select Device and press the right arrow key or space bar again to open up the device settings menu.
-
In the Device menu you can assign a custom name to the sensor and read out some additional device information.
-
Repeat steps 1..8 if you want to set up additional sensors.
14.4. Tank level monitoring
Tank levels can be monitored at various locations within the GX environment.
-
Device List of the GX device
-
Sensor overview menu of the GX device
-
Graphical overview of the GX device
-
VRM Dashboard
-
VRM advanced menu widgets
-
VRM App widgets
">
Visit Mopeka's Official Website for More Details
(M1017074)
| SKU | M1017074 |
| Barcode # | 854069008497 |
| MPN # | M1017074 |
12 Month Warranty


We'll keep you updated with the latest deals, so that you'll never miss out!