


Mopeka Pro Check Bluetooth LPG Tank Level Sensor (Victron Compatible)
Mopeka Pro Check Bluetooth LPG Tank Level Sensor (Victron Compatible)
Ultrasonic Gas Level Monitor with Bluetooth & App Connectivity
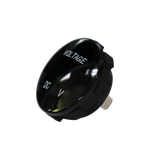
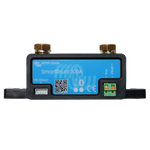
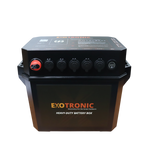
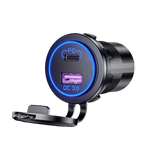
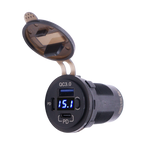
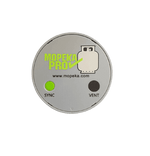
 Highlights:Sync Button: Green button used for syncing the device via Bluetooth,Vent Port: Vent opening on the sensor face,Product Branding: Mopeka Pro Check logo and gas bottle graphic.
 Key features: Compatible with Propane, Butane and mixtures, Mounts to Steel & Aluminium tank bottoms, Bluetooth communication, Replaceable CR2032 battery with 2-4 year life.


Regular price
$149.00
Availability:
In Stock
 View all products from Mopeka
Guaranteed Safe and Secure Checkout
22
DESCRIPTION
Advanced Ultrasonic LPG Level Monitoring
Precision Gas Measurement for Caravans, RVs, and Industrial Applications
Running out of LPG during an off-grid trip or crucial commercial operation is a frustrating and entirely preventable problem. Traditional pressure gauges often provide delayed or inaccurate readings, leaving users uncertain about their actual gas reserves. The Mopeka Pro Check offers a highly technical solution to this issue by utilising advanced ultrasonic sensing to measure the exact fluid level inside your gas bottle, ensuring you are never caught without fuel.
How the Mopeka Pro Check Works
Unlike basic mechanical dials that estimate volume based on pressure, this Mopeka gas sensor uses ultrasonic technology to detect the precise level of liquid propane or butane. By sending sound waves through the base of the cylinder, the sensor accurately calculates the remaining volume and instantly relays this data. This eliminates the inherent unreliability of standard gauges and provides a dependable reading regardless of external temperature fluctuations.
Seamless Bluetooth Connectivity and System Integration
This bluetooth gas bottle level indicator connects directly to your smartphone or tablet via the free Mopeka Check application. The interface provides real-time updates and low-level alerts directly to your device. For comprehensive off-grid power systems, the sensor features native compatibility with Victron GX devices, such as the Cerbo GX. This allows for centralised monitoring of both your electrical and gas reserves on a single digital dashboard.
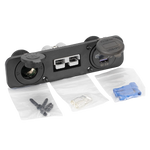
Versatile Tank Compatibility and Installation
Engineered for flexibility, the Mopeka Pro Check mounts securely to the bottom of the tank using built-in, heavy-duty magnets. It is suitable for both horizontal and vertical cylinders. For Australian users, the package includes dedicated cylinder spacers, ensuring adequate ground clearance for the sensor when fitted to standard 4kg and 9kg LPG cylinders. The unit is also highly scalable, capable of monitoring large residential or commercial storage tanks up to 1000 gallons (approx. 3785 L).
Key Features of the Mopeka Pro Check
- Highly accurate ultrasonic sensor technology for real-time volume readings.
- Direct Bluetooth communication to mobile devices for instant gas level monitoring.
- Native compatibility with Victron GX systems for integrated off-grid management.
- Fast magnetic mounting system allowing for installation in under 60 seconds.
- Includes dedicated tank spacers to suit standard Australian 4kg and 9kg gas bottles.
- Powered by a user-replaceable CR2032 coin battery providing up to two to three years of continuous operation.
- Broad compatibility with steel and aluminium tanks, ranging from small portable bottles to bulk storage up to 3785 L.
Eliminate the Guesswork of Gas Management
Relying on outdated mechanical monitors or the manual "hot water test" fails to provide the accuracy needed for reliable off-grid living. By upgrading to a dedicated LPG level sensor, you significantly reduce the risk of unexpected gas depletion. This protects critical systems like gas-powered refrigerators from shutting down and ensures continuous operation of heating appliances during cold weather.
Installation Instructions
Setup is straightforward and non-invasive. Simply clean the exterior base of your tank, apply a small amount of the provided sonic grease to the sensor pad, attach the unit magnetically, and sync it with your chosen monitoring device. For full visual instructions and troubleshooting, please refer to the Mopeka Pro Check Instructions.
Upgrade Your Gas Monitoring System
Ensure you always have a clear, accurate view of your LPG reserves. Integrate the Mopeka Pro Check into your RV, boat, or remote power system today, and experience the reliability of advanced ultrasonic monitoring for your next journey.
SPECIFICATIONS
Specifications
| Sensor | Pro Check |
|---|---|
| Commodity | Propane, Butane and Mixtures |
| Mounting Location | Tank Bottom |
| Tank Types | Steel & Aluminum |
| Tank Orientation | Horizontal & Vertical |
| Tank Size | 20, 30, 40 lb DOT (approx. 9.1, 13.6, 18.1 kg), <1000 gallons (approx. 3785 L) & Diameters 48″ (approx. 1.22 m) and below |
| Operating Temperature Range | -50° to 60 °C; -55° to 140 °F |
| Default Communications | Bluetooth |
| Installation Time | Set up: 2 to 3 minutes; Install: 60 seconds |
| Battery Life | 2-3 years, replaceable |
| Battery Type | CR2032 Coin/Watch Battery |
| SKU: | M1017012 |
| Barcode: | X003LPCX3T |
| Model #: | M1017012 |
| MPN: | M1017012 |
WARRANTY
Mopeka Warranty Policy
This warranty policy applies to Mopeka products sold in Australia through authorised dealers, resellers, distributors, approved websites, or approved sales channels. It applies to the original end-user purchaser of the product, as evidenced by the authorised dealer’s, reseller’s, or website invoice, and is not transferable without our written consent.
We warrant that Mopeka products supplied by us are free from defects in materials and workmanship under normal use and service, subject to the terms and conditions below. The benefits given by this warranty are in addition to any other rights and remedies available under law.
Our goods come with guarantees that cannot be excluded under the Australian Consumer Law. You are entitled to a replacement or refund for a major failure and compensation for any other reasonably foreseeable loss or damage. You are also entitled to have goods repaired or replaced if goods fail to be of acceptable quality and the failure does not amount to a major failure.
Warranty Coverage and Periods
This warranty covers Mopeka monitoring sensors, display products, and related electronic components. Warranty applies to manufacturing defects in materials and workmanship under normal recommended use.
- Mopeka Pro Check: 12 Month Warranty
- Mopeka Pro Check Universal: 12 Month Warranty
- Mopeka PRO200: 12 Month Warranty
- Mopeka LCD Display: 12 Month Warranty
- Mopeka TD40: 36 Month Warranty
Commencement of Warranty: The warranty period begins on the date of purchase by the original end-user, as shown on the authorised dealer’s, reseller’s, distributor’s, or website invoice. A valid proof of purchase from an authorised sales channel is required for all warranty claims.
Installation, Mounting and System Responsibility
Mopeka products may require mounting, pairing, configuration, connection to a display, app setup, or integration with a broader monitoring system. The installer, dealer, reseller, or end-user is responsible for ensuring that the product is suitable for the intended application and is installed, mounted, configured, and used correctly.
All Mopeka products must be installed and used in accordance with the product manual, Mopeka’s instructions, applicable safety requirements, and recognised industry best practice. Issues or damage arising from incorrect installation, unsuitable mounting, incorrect configuration, incompatible equipment, poor signal conditions, or failure to follow instructions are not product defects and are not covered by this warranty.
The installer or end-user is responsible for ensuring that sensors, displays, mounts, adhesive pads, wiring where applicable, connected devices, and any related equipment are compatible and suitable for the application. This warranty covers the Mopeka product only and does not guarantee the performance of the broader system, connected device, tank, cylinder, app, vehicle, vessel, or installation environment into which the product is fitted or used.
Products must be installed in a manner that allows reasonable access for inspection, testing, servicing, removal, and replacement. We are not responsible for additional labour, access equipment, removal of fixtures, or other costs caused by installation methods that restrict reasonable access to the product.
Warranty Exclusions
This warranty covers manufacturing defects or failures of the product arising from normal use in accordance with Mopeka’s instructions. It does not cover failure, damage, performance issues, deterioration, or loss caused by external factors, misuse, incorrect installation, or circumstances outside our control.
Warranty exclusions include:
- Improper installation, mounting or handling: Damage or malfunction caused by incorrect installation, unsuitable mounting surfaces, incorrect sensor placement, poor adhesion, incorrect configuration, failure to follow the product manual, mishandling during installation, or damage during removal or reinstallation.
- Misuse, abuse or neglect: Use outside product specifications, use for purposes the product was not designed for, physical abuse, dropping, crushing, impact damage, careless handling, neglect, deliberate damage, or continued use after a fault becomes apparent.
- Unauthorised modification or repair: Modification, alteration, disassembly, opening, repair, reprogramming, tampering, replacement of parts with non-original parts, or any other unauthorised interference with the product.
- Incompatible or third-party components: Failure or damage caused by incompatible connected devices, displays, apps, mounts, adhesives, accessories, power sources, wiring, software, firmware, or other third-party components not approved for the application.
- Environmental damage or exposure: Damage caused by environmental conditions outside the product’s specified tolerances, including water ingress where the product is not rated for the exposure, corrosion, excessive heat or cold, chemical exposure, excessive dust or contamination, fire, smoke, lightning, flood, storm, impact, vibration beyond specification, pest or animal damage, or improper storage.
- Signal, app or configuration issues: Issues caused by poor installation location, signal obstruction, incompatible phones or displays, incorrect app setup, outdated software or firmware, incorrect settings, or interference from the surrounding environment are not covered unless the underlying fault is confirmed to be a manufacturing defect in the Mopeka product.
- Consumables and normal wear: Replaceable batteries, adhesive pads, consumable items, cosmetic wear, fading, marks, scratches, and normal deterioration from use are not covered unless the item was defective when supplied.
- Lack of required maintenance: Failure caused by lack of reasonable inspection, cleaning, battery replacement, firmware or software updates where required, or continued use after visible damage or malfunction may void or limit warranty coverage.
- Serial number or identification removed: Where applicable, the product’s serial number, batch number, compliance label, rating label, or identification marking must remain intact, legible, and unmodified. Removal, defacement, alteration, or tampering with product identification may make the product ineligible for warranty service.
- Unauthorised resale or non-authorised dealer purchases: This warranty applies only to genuine new Mopeka products sold through authorised dealers, resellers, distributors, approved websites, or approved sales channels. Products purchased second-hand, from unauthorised marketplaces, auctions, liquidation sales, parallel imports, grey-market sellers, or unapproved channels may not be covered.
- Industrial, commercial or abnormal applications: Unless expressly approved in writing, this warranty applies to products used in normal recommended applications. Use in heavy industrial, hire fleet, continuous-duty, high-cycle, commercial, public infrastructure, or other high-stress environments may be excluded or subject to a separate warranty.
- Other exclusions: Accident, collision, fire, explosion, vandalism, theft, natural disaster, Force Majeure events, acts of God, transport damage after delivery, misuse by third parties, and other events beyond our control are not covered.
Making a Warranty Claim
Important: If you suspect a fault with a Mopeka product, do not immediately remove or uninstall the product unless it is unsafe to leave it in place or unless authorised by us or an authorised dealer. Premature removal can cause further damage, prevent proper assessment, and may make it impossible to determine the original cause of the issue.
- Contact the Dealer or Reseller: Warranty claims should be initiated through the authorised dealer, reseller, distributor, website, or place of purchase.
- Provide Product Information: The customer must provide proof of purchase, product model, serial number if applicable, a clear description of the issue, photos or videos of the fault, installation or mounting photos where relevant, and details of any connected display, app, or equipment.
- Assessment and Troubleshooting: The dealer, reseller, distributor, or our support team may conduct an initial assessment. This may involve safe checks, confirming settings, checking battery condition, testing the product in a different configuration, inspecting mounting position, or confirming installation details.
- Photographic Evidence: The customer may be required to provide clear photos of the product before removal, including the installed location, mounting points, surrounding area, labels, serial numbers, and any visible damage.
- Return for Testing, Repair or Inspection: If the fault cannot be confirmed by correspondence, photos, or remote troubleshooting, the product may need to be returned for inspection, testing, repair, or replacement assessment. The dealer, reseller, distributor, website, or place of purchase will provide return instructions.
- Evaluation and Outcome: Once received, the product will be inspected and tested to determine whether the fault is covered by this warranty. If the fault is confirmed to be due to a manufacturing defect or covered failure, we will provide an appropriate remedy. If the product is found not to be faulty, or the issue is caused by an excluded factor, the claim may be rejected.
Remedies Under Warranty
If a defect covered by this warranty is confirmed, we may, at our discretion, provide one or more of the following remedies:
- repair;
- replacement;
- refund;
- credit;
- supply of replacement parts;
- another appropriate remedy required by law.
Repair: If the defect can be resolved by repair, we may repair the product or relevant components. Repairs will be performed by us, an authorised service provider, or another approved party.
Replacement: If the product or major component is not reasonably repairable, we may provide a replacement. The replacement may be the same model, a superseded equivalent, a product with similar specifications, a new unit, or a refurbished or factory-reconditioned unit where permitted by law.
Refund or Credit: In some cases, we may provide a refund or credit. Refunds will usually be handled by the original place of purchase. The refund amount will not exceed the original purchase price paid for the affected product unless otherwise required by law.
No Charge for Approved Claims: For approved warranty claims, the repair, replacement, refund, or approved remedy will be provided at no charge to the customer.
No Extension of Original Warranty: Repair or replacement under this warranty does not restart or extend the original warranty period. The warranty continues from the original purchase date.
Limit of Liability
To the extent permitted by law, our liability under this warranty is limited to the repair, replacement, refund, credit, or approved remedy relating to the defective Mopeka product supplied.
We are not responsible for special, indirect, incidental, or consequential loss arising from product failure, installation issues, misuse, system design, or breach of warranty. This includes, to the extent permitted by law, labour costs, removal or reinstallation costs, travel costs, freight not approved by us, access equipment, loss of revenue, loss of profit, downtime, loss of use, damage to other equipment, property damage, personal injury, loss of data, or economic loss.
Nothing in this warranty excludes, restricts, or modifies any rights or remedies that cannot be excluded under Australian Consumer Law.
Contact
For warranty support, contact the authorised dealer, reseller, distributor, website, or place of purchase.
Thank you for choosing Mopeka products.