 Solar Panels
 Solar Controllers
 Batteries
 Inverters
 Mains Chargers
 DC-DC Chargers
 Cables/Accessories
 Power Converters
 Monitoring
 Kits
Kits












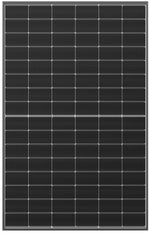
Risen 475W N-Type TOPCon Bifacial Black Fixed Solar Panel
Risen 475W N-Type TOPCon Bifacial Black Fixed Solar Panel
Efficient TOPCon Cells - 1762x1134x30mm Black Frame


Regular price
$297.00
Availability:
In Stock
 View all products from Risen
Guaranteed Safe and Secure Checkout
20
DESCRIPTION
Risen 475W N-Type TOPCon Bifacial Black Fixed Solar Panel
High-Efficiency 475W Solar Panel for Residential, Commercial and Off-Grid Applications
The Risen 475W N-Type TOPCon Bifacial Black Solar Panel combines advanced N-Type TOPCon cell technology with a durable dual-glass bifacial design to deliver exceptional power output, long-term reliability and outstanding energy generation.
With a high module efficiency of 23.8%, this premium 475W solar panel maximises energy production while maintaining excellent performance in both high-temperature and low-light conditions. Its sleek black frame also provides a clean, modern appearance suitable for residential, commercial and off-grid installations.
Advanced N-Type TOPCon Solar Cell Technology
Built using advanced N-Type TOPCon (Tunnel Oxide Passivated Contact) solar cells, the Risen 475W panel offers higher efficiency and lower degradation than conventional P-Type solar panels.
N-Type technology also provides improved low-light performance, allowing the panel to generate more usable energy during cloudy weather, early mornings and late afternoons.
Why Choose N-Type TOPCon?
Risen's N-Type TOPCon technology is engineered to deliver maximum long-term performance with improved reliability and energy yield over the life of the panel.
• High 23.8% module efficiency
• Excellent low-light performance
• Lower long-term power degradation
• Excellent anti-LID and anti-PID performance
• Outstanding temperature coefficient of -0.29%/°C for improved hot weather performance
Bifacial Dual-Glass Construction
The Risen 475W module features a bifacial dual-glass design that allows the rear side of the panel to capture reflected sunlight from surrounding surfaces, increasing total energy production in suitable installation conditions.
Its dual-glass construction provides additional durability and environmental protection while reducing the risk of moisture ingress and improving long-term reliability.
• Additional energy generation from reflected sunlight
• Durable dual-glass construction
• Improved resistance to moisture and environmental exposure
• Excellent long-term reliability
• Ideal for ground-mounted and elevated installations where rear-side gain can be maximised
Built for Australian Conditions
Designed to operate in demanding environments, the Risen 475W panel delivers dependable performance across a wide range of Australian climates. Its excellent temperature coefficient helps maintain higher power output during hot summer conditions, while its strong low-light performance improves generation throughout the day.
The panel is also engineered with excellent anti-LID (Light Induced Degradation) and anti-PID (Potential Induced Degradation) characteristics, helping maintain consistent performance over decades of operation.
Ideal for Residential, Commercial and Off-Grid Systems
With its combination of high efficiency, bifacial technology and premium build quality, the Risen 475W N-Type TOPCon Solar Panel is suitable for a wide range of solar installations.
• Residential rooftop solar systems
• Commercial and industrial solar installations
• Off-grid battery charging systems
• Agricultural and rural properties
• Ground-mounted solar arrays
• Large-scale energy projects
Industry-Leading Warranty
Risen backs the 475W N-Type TOPCon Bifacial Solar Panel with a 25-year product warranty and a 30-year linear power warranty, providing long-term confidence and dependable energy production for decades to come.
Generate More Energy with Risen TOPCon Technology
Combining advanced N-Type TOPCon cells, bifacial dual-glass construction and premium engineering, the Risen 475W Solar Panel delivers outstanding efficiency, durability and long-term performance for residential, commercial and off-grid solar systems.
SKU: Ris-RSM96-11-475BNDG
Visit Risen's Official Risen 475W N-Type TOPCon Bifacial Black Fixed Solar Panel Webpage Here
SPECIFICATIONS
Technical Specifications
| Model | RSM96-11-475BNDG |
| Rated Power | 475W |
| Solar Cell Technology | N-Type TOPCon |
| Module Type | Bifacial Dual-Glass Module |
| Module Efficiency | 23.8% |
| Positive Power Tolerance | 0 to +3% |
| Open-Circuit Voltage (Voc) | 36.42V |
| Short-Circuit Current (Isc) | 16.52A |
| Maximum Power Voltage (Vmpp) | 30.78V |
| Maximum Power Current (Impp) | 15.46A |
| Bifacial Factor | 80 ± 5% |
| Equivalent Power with 10% Rear-Side Gain | 523W |
| Module Dimensions | 1762 x 1134 x 30mm |
| Weight | 21.5kg |
| Cell Configuration | 96 cells |
| Front Glass | 1.6mm high-transmission, AR-coated heat-strengthened glass |
| Rear Glass | 1.6mm heat-strengthened glass |
| Frame | Black anodised aluminium alloy |
| Junction Box | IP68, 1500V DC, 3 bypass diodes |
| Cable Size | 4.0mm² |
| Cable Length | 1200mm positive and 1200mm negative |
| Connector | MC4 EVO2 / PV-SY02 / Other compatible connector |
| Maximum System Voltage | 1500V DC |
| Maximum Series Fuse Rating | 35A |
| Operating Temperature | -40°C to +85°C |
| Temperature Coefficient of Pmax | -0.29%/°C |
| Maximum Mechanical Load | 5400Pa front / 2400Pa rear |
| Product Warranty | 25 years |
| Linear Power Warranty | 30 years |
| SKU: | Ris-RSM96-11-475BNDG |
| Model #: | Ris-RSM96-11-475BNDG |
| MPN: | Ris-RSM96-11-475BNDG |
| HS code: | 8541430010 |
| Country of origin: | CN |
| Package weight: | 21.5 kg |
| Package length: | 1785 mm |
| Package width: | 1170 mm |
| Package height: | 65 mm |
WARRANTY
Risen Manufacturer Warranty
The Risen 475W N-Type TOPCon Bifacial Solar Panel is supported by a 15-year limited product warranty covering qualifying defects in materials, design and workmanship under normal installation, use and service conditions.
It is also backed by a 30-year limited power warranty. For the RSM96-11 series, Risen warrants that the module will retain at least 99% of its rated power at the end of the first year, followed by no more than 0.4% annual degradation for each subsequent year, subject to the full warranty terms and conditions.
Where an eligible warranty claim is accepted, Risen may, at its discretion, provide additional modules to compensate for the power shortfall, repair or replace the affected module, or provide an applicable refund calculated under the warranty terms.
Warranty coverage requires correct installation and use in accordance with Risen’s instructions, proof of purchase and the module serial number. Claims should be submitted promptly after a defect is identified. This warranty is provided in addition to rights and guarantees available under Australian Consumer Law.
Warranty summary:
• 15-year limited product warranty
• 30-year limited power warranty
• Minimum 99% rated power at the end of year one
• Maximum annual degradation of 0.4% after the first year
• Transferable to a new legal owner when the warranty conditions are met
• Subject to Risen Energy’s complete warranty terms, exclusions and claims procedure
WIRING INSTALLATION
SOLAR 4 RVS
OFF-GRID, EXTRA LOW VOLTAGE SOLAR PANEL WIRING GUIDE
Please read this document in full before commencing installation.
To maximise the efficiency and longevity of your new solar panels, please ensure you follow the instructions in this guide carefully. Failure to do so WILL result in shortened panel lifespan AND void your warranty.
While it seems simple to connect solar panels to your battery, common installations practices such as using non-waterproof connectors as permanent connection points CAN damage the solar panel AND void your warranty, please continue reading the guide for more details.
Whilst due care has been taken to ensure the recommended wiring practices will provide a safe and efficient installation, we cannot guarantee these methods will be suitable in every scenario due to variations in cable, connectors, solar charge controllers, environment, and installation practices. It is the duty of the installer to verify the installation is installed to local standards and refer to each manufacturer’s instructions.
This guide is limited to 12 and 24V battery systems.
Contents
Selecting an Appropriate Solar Panel based on the Specifications
Series, Parallel and Combination Wiring Installations
Installation Type 1 – Parallel Wiring
Installation Type 2 – Series Wiring
Installation Type 3 – Series/Parallel Combination Wiring
Paralleling and Series of Different Solar Panels
Bypass, Blocking Diodes and Shading
Sizing a Solar Charge Controller
Safety
- All work should be carried out in shade or inside out of direct sunlight. Use a towel or blanket on top of the panel to reduce light exposure;
-
 Work safely at heights. Ensure you have a sturdy, secure ladder;
- Use insulated tools;
- Ensure the panels are kept covered during installation;
- Wear appropriate footwear;
-
 Use gloves and other PPE where appropriate;
- Seek help where needed.
- This guide is only relevant for installations installed at below 120V DC using the Open Circuit Voltage (Voc) rating of the solar panel.
Example: Model Exo-SP-F4-200, the Voc is 24.1V, therefore 5 panels in series is 120.5V and would require a licensed electrician to complete an installation.
- Extra low voltage solar arrays CAN cause fires AND/OR injury/death if adequate precautions are not taken.
- Do not leave the solar panel short-circuited (i.e. the MC4 connectors should NOT be connected together) and exposed to the sun, this can cause failure of the bypass diodes, hot-spots and permanent damage to the solar panel within minutes.
Selecting an Appropriate Solar Panel based on the Specifications
 The wattage of the solar panel is calculated by Max Power Voltage (Vmp) x Max Power Current (Imp), i.e. 10.2A x 19.8V = 202W.
When no power is being drawn from the solar panel, the Voc will be present.
To charge a 12V battery bank, dependent on the charge controller, approximately 7V is required between the absorption voltage requirement of the battery and the solar panel Voc. I.e. a calcium 12V battery that requires 14.8V absorption voltage, will need a panel with at least 21.8Voc. Most solar panels are approx. 23Voc. When calculating the array current, use the short circuit current (Isc). Our guide to reading solar panel specifications explains Voc, Isc, Vmp and Imp in more detail.
The diagram to the right shows a simple photovoltaic (PV) / solar array connected to a 12V battery.
Never install a solar panel in a permanently shaded location, this can damage the bypass diode and cause hot spots.
If a solar isolation switch is used, it should be sized to handle the full short circuit current of the array, plus ~20% to avoid nuisance tripping. I.e. if an array is rated to 30Asc, then the circuit breaker should be at least 36A, the closest match will be a 40A circuit breaker.
Series, Parallel and Combination Wiring Installations
When more than one solar panel is used, each solar panel can be connected to an individual solar charge controller, this will generally lead to the best performance but at the highest cost and complexity.
An alternative is to wire the panels in either series or parallel or a combination of both.
 Installation Type 1 – Parallel Wiring
This type of installation, most common for off-grid 12V systems, each solar panel positive is connected together, and each negative connected together. In this case, the array voltage will remain the same as a single solar panel, however the array current will increase.

If a solar panel were to fail by an internal fault, such as an internal bypass diode short circuit, the fault current of the array would all flow through the failed diode. There are many examples of this causing fires, string fusing has been designed to minimise the risk.
In the example (above) of three solar panels, if the left panel were to fail from a shorted bypass diode, the middle and right solar panels would each pass 10A into the left solar panel. Therefore, 20A would pass through the 15A fuse, and cause it to disconnect the failed solar panel from the array. Choose a string fuse rated above the panel’s Isc but no higher than the “maximum series fuse rating” printed on the panel label, and use DC-rated PV fuses rated for the array voltage.
The fuses should be located close to 3 to 1 branch connector.
Fusing is not required when two or fewer solar panel are used because it is not possible for the fuse to reach the required tripping current.
Parallel arrays provide good tolerance to shade and keeps the voltage low, and thus safer.
Installation Type 2 – Series Wiring
 In this type of installation, commonly used in 24V systems, one solar panel positive is connected to the next solar panel negative. In this case, the array current will remain the same as a single solar panel, however the array voltage will increase. Typically, 24V systems require an open circuit array voltage of at least 36.6V.
Each group of panels wired in series is called a “string”.
The advantages of series wiring are:
- Reduced wiring cost
- Reduced power losses in cables
- Typically improved performance in MPPT solar charge controllers
The disadvantages are:
- Poor shade tolerance
- High voltage rated solar controllers often required
- Less safe
Installation Type 3 – Series/Parallel Combination Wiring
This type of installation, commonly used in larger systems, two or more solar panels are connected in series to make a string, and two or more strings are paralleled together. In this case, the array current AND the array voltage will increase.
A note on MC4 solar connectors, these types of connectors are waterproof, affordable, high voltage rated, are pre-installed on most solar panels and are usually disconnectable. The current rating is typically limited to approx. 30A when 6mm2 or larger PV1-F solar cable is used, therefore they would not be suitable for four 10A solar panels wired in parallel without overloading the connector. Series/parallel wiring arrangements are a good way to overcome this while still being able to use these types of connectors

The advantages of this type of system wiring are:
- Partially reduced wiring cost
- Partially reduced power losses in cables
- Typically improved performance in MPPT solar charge controllers
- Avoids the need for string fuses when no more than two strings are paralleled
- Reasonable shade tolerance
The disadvantages are:
- High voltage rated solar controllers often required
Paralleling and Series of Different Solar Panels
Panels can typically be wired in parallel when the same type of solar cell and voltage is used. I.e. two solar panels using P-type mono-PERC cells and both 24Voc can be paralleled, but if a P-type mono-PERC cell and n-type IBC cell are paralleled, differing coefficients of performance will cause a mismatch in voltages, causing the higher voltage panel to be “dragged down” to the lower voltage panel and increasing the risk of panel failure. Consult your distributor for verification before paralleling different types of solar panels.
At the time of writing, the Exotronic PERC series of solar panels are all designed to use the exact same cell cut into 36 pieces and therefore the voltage and performance will be nearly identical, and will thus provide good performance when paralleled.
Panels can only be wired in series when the cell type and current are the same, this is quite rare. Therefore typically only the same solar panel make and model can be wired in series.
Example: 2x 200W Exotronic Solar fixed solar panels can be wired in series, and 2x 30W Exotronic fixed solar panels can be wired in series, and each string can be wired in parallel. But the 30W and 200W panel cannot be wired in series. If you are adding a panel to an existing system, see how to add a second solar panel to your caravan.
Cable Size
The most practical wire for solar panels is PV1-F solar cable, this cable is most common in 4mm2 and 6mm2. A very rough rule of thumb is for arrays of less than 20A can use 4mm2, and 20A or larger should use 6mm2. If a larger size is required, it is recommended to run two runs from the array to the solar controller. There is no harm in using larger size cable except for practicality and cost considerations.
The rule of thumb above does not allow for cable length. The table below shows the approximate voltage drop on tinned-copper PV1-F cable for a typical 12V parallel array (array Vmp about 18V), counting both the positive and negative cables. Aim for about 3% or less; on longer runs use the larger cable or run two cables.
| Array current | One-way cable run | 4mm² PV1-F | 6mm² PV1-F |
|---|---|---|---|
| 10A (e.g. one 200W panel) | 3m | 0.31V (1.7%) | 0.20V (1.1%) |
| 10A | 5m | 0.51V (2.8%) | 0.34V (1.9%) |
| 10A | 10m | 1.02V (5.7%) | 0.68V (3.8%) |
| 20A (e.g. two 200W panels in parallel) | 3m | 0.61V (3.4%) | 0.41V (2.3%) |
| 20A | 5m | 1.02V (5.7%) | 0.68V (3.8%) |
Values use the standard conductor resistance at 20°C (5.09 ohm/km for 4mm² and 3.39 ohm/km for 6mm² tinned cable); cable on a hot roof has slightly higher resistance. To check your own runs, use our Ultimate DC Cable Sizing & System Calculator or the RV Cable Sizing and Wiring Diagram Tool, and see our cable size conversion tables to convert between mm², B&S and AWG.
PV1-F cable is highly UV resistant, durable, high voltage rated, designed to fit MC4 connectors, highly stranded, and tinned copper. It’s properties mean the cable is well suited for most applications including marine, and it is also cost effective.
Solar Array Performance
Solar panels are rated at Standard Test Conditions (STC), this means solar panels are tested under a light source of 1000W/m2 with a cell temperature of 25°C and an AM1.5 light spectrum. This is why it is not typical to see the solar panel output in typical conditions, combined with the other losses (dirt on panel, cable/connection losses, sun orientation, panel temperature, solar controller losses, battery efficiency losses) the actual output that will be seen will likely be much lower.
Often a rule of thumb is you will see up to 75% of the STC rating of the solar panel at midday in summer. I.e. 150W from a 200W solar panel.
In some rare cases you may see close to full output, i.e. the solar panel has been stored in a cool garage, and suddenly exposed to full midday summer sun. As the panel heats up, performance will drop to the more typical 75% output.
For the best performance, the solar panel should be perpendicular to the sun, however normally brackets to make the solar panel face the sun provide minimal performance improvement at a much higher complexity and cost.
Bypass, Blocking Diodes and Shading
 Each solar panel will have one or more bypass diodes. Despite the marketing claims, the main purpose of bypass diodes is to protect the cells from overheating. When a cell is shaded it causes the cell to increase resistance, as current flows through the resistance, the cell heats up, and if the current is not bypassed around the cell, it will cause a hot spot and subsequent failure of the cell, and as each cell is wired in series, failure of the whole solar panel.
In 12V arrays, the bypass diodes, while necessary for the purpose of protection of the cells, provide minimal performance improvement.

When a solar panel is completely shaded, it can become a resistance, causing the power flow of other solar panels to flow through it in reverse thus causing power loss in the system.
Blocking diodes can be installed to prevent this. However, this event is rare, and the diodes will cause power loss at all times. Therefore, unless specifically required by the manufacturer, blocking diodes should be avoided. Most good quality solar controllers should have their own blocking diode installed, and therefore an additional blocking diode is not necessary for single panel installations. They are also not a replacement for string fusing. If you suspect a failed panel, see how to test a solar panel’s output with a multimeter and our article on caravan solar panel failures.
Sizing a Solar Charge Controller
The solar charge controller or solar regulator must be sized appropriately for the array. A too small charge controller can be damaged, and too large can be unnecessary.
If using a PWM controller, typically you must use a larger controller than required. You must also use a 30-36 cell (17 to 20Vmp) solar panel on a 12V battery or 60-72 cell (34 to 40Vmp) solar panel on a 24V battery. A PWM controller passes the array current straight through to the battery, so size it from the array’s short-circuit current rather than its wattage: add the Isc of every panel wired in parallel and allow a margin of about 25%. For example, two panels with an Isc of 11A each give 22A, so choose a controller rated for at least 27.5A, i.e. a 30A PWM controller.
If using an MPPT controller, you can often size the controller smaller to reduce costs, while still allowing maximum performance in winter. When using an MPPT, ideally use a 36 cell or more (19Vmp+ limited by the maximum input voltage rating of the PV input of the solar controller) solar panel on a 12V battery. To size an MPPT controller, a simple calculation is: Power of Array in Watts / Battery Bank Voltage x 0.8 for losses, i.e. 400W / 12V x 0.8 = 26.7A controller required. However you can often downsize to a 20 or 25A controller as it is often only in summer when the most power is available, that the controller will reach the maximum output, and therefore oversizing is not necessary.
MPPTs will have significantly improved performance when it is required the most, i.e. during the cooler months where there is more likely to be shading, and low light conditions. For a fuller comparison, see our guide to choosing between PWM and MPPT solar charge controllers.
Solar Panel Efficiency
 Solar cell efficiency is effectively how much light is converted to power in terms of m2 of the solar cell.
Solar panel efficiency is the same measurement, but takes into account the entire panel, i.e. the space between the cells and the frame. Therefore solar panel panels can be more efficient simply by decreasing the space between the cells, and to the frame. This is why larger solar panels are more efficient then smaller panels; less borders/gaps to cell ratio.
Practically speaking, when useable area is limited, a 22% efficient 300W solar panel could take up most of the available space, limiting the room for future panels and increasing the complexity of wiring, whereas it could be possible to install 2x 200W modules plus a 160W solar panel on a single controller, greatly increasing the total power of the array and keeping the wiring relatively simple. There are many different solar technologies, the most common is monocrystalline. While the highest cost, it is higher in efficiency compared to polycrystalline and amorphous, and therefore reduces the quantity of solar panels needed and simplifies the system. Amorphous, while having improved shade tolerance, is very low efficiency, therefore even when compared to a shaded monocrystalline module, the overall output can often be worse.
Cells get exponentially more expensive as the efficiency increases, the easiest way for unscrupulous retailers to increase profits is to overstate the rated output of the solar panel. In the example below, the solar panel is 18V and advertised to be 350W, therefore it should have an Imp of approximately 19.4A. The cells, based on the specifications and appearance are ¾ cut 156mm cells with 5 wire busbars. The highest output possible on cells of this nature is approximately 7.5A. Therefore it is not physically possible for this solar panel to exist. A true output of a panel this size will be approximately 120 to 130W based on several reasonable assumptions. As Sunpower uses interdigitated back contact cells, there are no busbars on the front, so the cells type stated below is also incorrect.

The highest cost and most efficient solar cells commercially available at the time of writing are approximately 24% efficient, and therefore the maximum efficiency for a very large module could approach 23% efficient.
Maintenance
To ensure your solar panels are performing optimally, be sure to keep on top of this simple maintenance checklist.
- Clean on a regular basis with neutral soap & clean water, using a soft sponge or cloth;
- If in a marine environment, wash regularly with fresh water to avoid damage caused by saltwater;
- Periodically inspect the mechanical and electrical connections;
- Denatured alcohol (methylated spirit) can be used to remove grease etc. See how to clean solar panels on your roof for step-by-step advice.
Ongoing Support
Solar 4 RVs are proud to offer a support service beyond the purchase of your solar panels. If you require further technical support, please feel free to contact us. We are happy to help!